
 VGR
VGR


Search Product
How To Fix Hair Clipper
To fix a hair clipper that is pulling hair, making loud noises, or failing to cut, you must follow a systematic maintenance check: First, deep clean the blade area by removing the top casing to clear out trapped hair and solidified grease, which often jams the motor. Second, apply 2-3 drops of clipper oil directly onto the blade teeth and run the machine for 10 seconds; lack of lubrication is the primary cause of snagging. Third, adjust the “power screw” (located on the side of the housing) by turning it clockwise until the loud buzzing stops to restore full power. Finally, if the cut is uneven, loosen the blade screws to re-align the static and moving blades, ensuring they are parallel and straight. In 90% of cases, your clipper is not broken—it simply needs cleaning, oiling, and tuning.
Step 1: Deep Cleaning Of The Internal Mechanical Structure
Many people think that even if the surface of the blade is cleaned with a small brush, it is purely psychological comfort and cannot solve the core mechanical Caton. The fader becomes “dull” or “fleshy” often because it is stuffed inside.
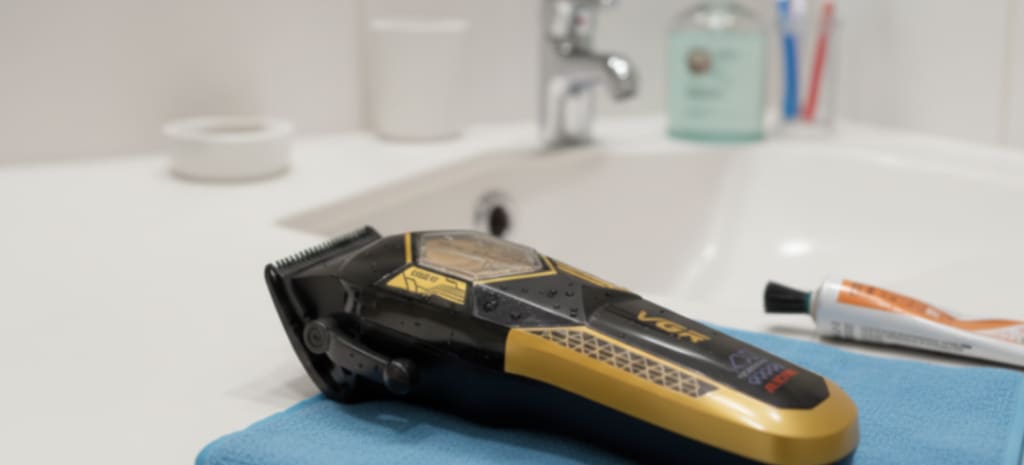
- To remove the housing: carefully unscrew the screw of the top cover of the pusher.
- Clean up the silt: You’ll most likely see broken hair stuffed around the motor rocker and blade base. These hairs, mixed with the old lube, turn into a kind of black mud like glue.
- Remove obstacles: Take a stiff brush or pick a needle and clean up the dirt thoroughly. As long as these “physical obstacles” removed, the motor speed will immediately return to normal.
Step 2: Must Be Lubricated, Say Goodbye To Pull Hair
Friction is the bitter enemy of a sharp blade. If the pusher is pulling the guest’s hair raw instead of cutting it off cleanly, it means that the friction between the metal parts has already exploded.
- Oiling: Drop 2-3 drops of special pusher oil on the teeth of the knife and the rear corner of the contact between the moving knife and the static knife. This step must not be saved.
- Evenly distributed: Turn on the machine immediately after dripping oil and let it idle for at least 10 seconds. Use the centrifugal force of vibration to make the oil film evenly cover the internal cutting surface.
- Effect: When the oil is in place, the heat and friction will drop. The blade glides through the hair as smoothly as it cuts cream, never pulling the scalp again.
Step 3: Adjust The Power Screw To The Peak State
If your flipper makes a harsh impact sound, or the vibration is too big but there is no cutting force, then the voltage frequency is not right. Most professional electric fader has a screw on the side, which is the switch that manually controls the range of motion of the electromagnetic motor.
- Adjustment process: when the power is turned on, turn the power screw clockwise with a screwdriver, and you will hear the noise getting louder and louder, even turning into a harsh “rattling” sound.
- Look for the “golden spot”: after hearing the strange sound, start slowly twisting back counterclockwise. At the moment when the noise disappears and the sound becomes smooth and dull, stop. This position can ensure that the electromagnet pulls the rocker arm with maximum force without hitting the internal stopper, and can instantly retrieve the torque required to trim thick and hard hair.
Step 4: Realign The Blade To Ensure That The Shear Is Smooth
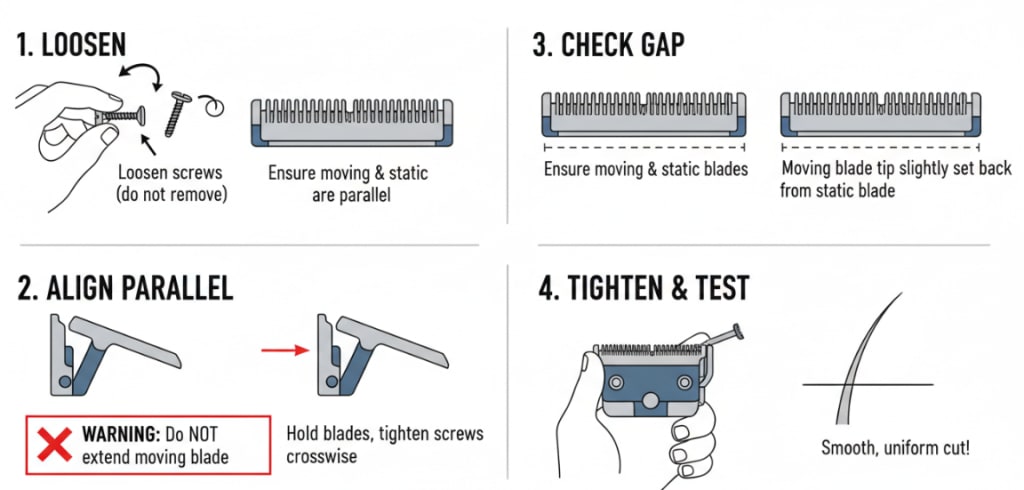
If you find that the cut is gradually printed, or you always “bite” (pinch the skin) occasionally, then there must be a problem with the blade alignment. The large static knife and the small moving knife must remain absolutely parallel.
Unscrew, don’t screw off: loosen the two screws that fix the blade a little, as long as you can move the blade with your fingers.
- Align: Make sure the moving knife and the static knife are parallel.
- Check the gap: the tip of the moving knife must be slightly retracted a little more than the static knife. If the tip of the moving knife protrudes beyond the static knife, it will definitely cut the guest’s skin.
- Fixing: Hold the position of the blade by hand, and tighten the screws cross. After the alignment of the blade cut will have that smooth, uniform texture.
Troubleshooting Frequently Asked Questions (FAQ)
A: 100 percent of this situation is a lack of oil. The dry blade will lead to a sharp increase in friction, and the blade is “clamped” against the hair and forcibly pulled off. Quickly drop 2-3 drops of oil on the knife teeth, idling for 10 seconds, and the effect will be immediate.
A: This kind of noise usually indicates that the motor needs to be “calibrated” and does not mean that the machine is broken. Find the power screw on the side and turn it clockwise until it sounds, and then turn it counterclockwise until the sound becomes stable. This is what I often call “finding frequency”. After adjusting, the power is the strongest and the sound is the most pleasing to the ear.
A: Most of these are “traffic jams” inside. Broken hair and sludge dried up inside the machine and jammed the rocker arm. You have to take apart the shell and do a deep cleaning to remove the old dirt around the motor rocker arm.
A: The blade is crooked. Loosen the blade screw, manually adjust the static knife and the moving knife to be completely parallel, and ensure that the moving knife is not offside. As long as it is aligned, the clipping effect will naturally be smooth.
Author: Mark Miller
I specialize in tool maintenance and repair. I believe that in 90% of cases, a ‘broken’ clipper just needs the right care. My articles focus on systematic troubleshooting—teaching you how to deep clean trapped grease, master lubrication, and adjust power screws to restore your tools to factory performance.
